Thursday, October 12, 2023

Arcade DIY - MAME, RetroPi, Batocera Linux and more - Access your Linux Boot Drive on Widows

 Wow, this has been an effort. All I wanted to do was plug in my Batocera boot drive, add some files to it, and move on.

The quick way to do it?

  • Boot your Batocera.Linux USB drive on ANY machine (it won't erase the local drive unless you tell it to)
  • Find out where on the network it is in File Explorer (usually \\batocera\Share)
  • Now you can browse it and drop files to it.
Now....If you are like me and you have a card full of micro SD chips (dust motes I call them) and you have no idea what was installed on each of them. Then you have this problem.
  1. I don't know what's on there
  2. I don't want to boot it up
  3. I don't even know if this is a Raspberry Pi boot chip or x86
  4. When I plug it into windows I get one drive that looks vaguely familiar Some boot files.
  5. I can't see the other drive (cause it's linux and Microsoft doesn't want to talk to Linux)
You will need to do a few things.
  1. Install WSL (Windows System for Linux) on your machine.
    1. Install WSL | Microsoft Learn
  2. That's great, but when you do the whole "Mount a Linux Drive for Windows"
    1. Windows 10 now lets you mount Linux ext4 filesystems in WSL 2 (bleepingcomputer.com)
    2. wmic diskdrive list brief
    3. wsl --mount [DiskPath]
    4. wsl --mount \\.\PHYSICALDRIVE0
  3. It fails. Because WSL Does not support mounting USB Drives at all.
  4. So now you have to install an additional utility
  5. Connect USB devices | Microsoft Learn

After that, you should be able to mount and see the Linux partitions and do something useful with it. It's a pain in the butt, but until Microsoft learns to play nice with Linux, that is where you're at.

Oh, the other "simple" way?
You weren't using that old Core2 Duo machine for anything anyway.

Monday, May 3, 2021

Cisco Broke my Mail Server

The Rant 

I don't usually write about networking, but I'm having to do a bit more of it lately. Today we found that a new Cisco Firepower ASA broke our e-mail servers.

The Problem

SMTP Mail queues are backing up. Mail is not transferring. Now this isn't the internal, within the domain mail. This is going to another domain in the org. Still managed, sort of, by us, but separate. Complaints abot Non-delivery receipts start coming in.

You go to the Exchange Management Console, go to tools, click Queue Viewer and yup. A bunch of e-mail in the queue. This isn't dial-up days, mail shouldn't be in there unless they have bypassed your great e-mail attachment rule that limits sending Windows ISO images via e-mail. (thank you Jim!!) So you start to look around to see what is causing it.

Normal Problem

Usually this is cause my McAffee AV 8.8 and the Block Mass Mailing Worm rule. Enabled by default and applied by lazy busy admins to Exchange Servers. This is the main cause of intra domain e-mail backups. In McAfee Endpoint Manager there is a rule that you CAN enable, but is not enabled by default.

The Other Problem

OK, so to figure out if this is your problem, telnet to both exchange servers. (OK, I was stupid, so I'll put this in here. If you run putty, make sure to change the radio button to telnet because SSH will NOT work.) When you telnet in, You will get one of two things:

220 ************************************************************

or

220 SVR-LAB-EXC-01, Microsoft <blah blah blah>

The ***s are wrong. That is coming from the Firewall. You need to remove the SMTP block on there. A google search will turn up a "fixup protocol smtp 25" command. That's what broke it and seems to be in there by default, but doing a "no fixup protocol smtp 25" just doesn't work like other cisco commands should. This should work to remove the ESMTP Inspection.

# policy-map global_policy

# class inspection_default

# no inspect esmtp

Be happy today!!


VMWare PowerShell Module Problems

 Problem

Can't update the PowerShell Modules for VMware. You did it a year of more ago because you use VMWare Powershell Modules offline on an airgapped system. You remember doing it, but can't recall the sequence of events. Typical.

Errors

Now you recall, you try to use the:
Install-Module -Name VMware.PowerCLI
But you get an error. And the Error dialog says, Do you want to load the new version of NuGet, and of course you say yes, cause, "do it for me" is easiest. But it doesn't work.
WARNING: Unable to download from URI 'https://go.microsoft.com/fwlink/?LinkID=627338&clcid=0x409' to ''.
WARNING: Unable to download the list of available providers. Check your internet connection.
PackageManagement\Install-PackageProvider : No match was found for the specified search criteria for the provider 'NuGet'. 
The package provider requires 'PackageManagement' and 'Provider' tags. Please check if the specified package has the tags.
At C:\Program Files\WindowsPowerShell\Modules\PowerShellGet\1.0.0.1\PSModule.psm1:7405 char:21
+ ...     $null = PackageManagement\Install-PackageProvider -Name $script:N ...
+                 ~~~~~~~~~~~~~~~~~~~~~~~~~~~~~~~~~~~~~~~~~~~~~~~~~~~~~~~~~
    + CategoryInfo          : InvalidArgument: (Microsoft.Power...PackageProvider:InstallPackageProvider) [Install-PackageP 
   rovider], Exception
    + FullyQualifiedErrorId : NoMatchFoundForProvider,Microsoft.PowerShell.PackageManagement.Cmdlets.InstallPackageProvider
 
PackageManagement\Import-PackageProvider : No match was found for the specified search criteria and provider name 'NuGet'. 
Try 'Get-PackageProvider -ListAvailable' to see if the provider exists on the system.
At C:\Program Files\WindowsPowerShell\Modules\PowerShellGet\1.0.0.1\PSModule.psm1:7411 char:21
+ ...     $null = PackageManagement\Import-PackageProvider -Name $script:Nu ...
+                 ~~~~~~~~~~~~~~~~~~~~~~~~~~~~~~~~~~~~~~~~~~~~~~~~~~~~~~~~~
    + CategoryInfo          : InvalidData: (NuGet:String) [Import-PackageProvider], Exception
    + FullyQualifiedErrorId : NoMatchFoundForCriteria,Microsoft.PowerShell.PackageManagement.Cmdlets.ImportPackageProvider
You try an administrator shell if you didn't have that already, but still NO.
OK, now here is what the problem is. The last time you ran this, TLS1.0 and SSL3.0 were great!! but now they suck and you are still using them. What to prove it? type:
[Net.ServicePointManager]::SecurityProtocol
and you get tls, ssl3 and Pppptthhrrrr. You lose.

OK, so Lets add the new TLS 1.1 and 1.2

Set-ItemProperty -Path 'HKLM:\SOFTWARE\Wow6432Node\Microsoft\.NetFramework\v4.0.30319' -Name 'SchUseStrongCrypto' -Value '1' -Type DWord
and then
Set-ItemProperty -Path 'HKLM:\SOFTWARE\Microsoft\.NetFramework\v4.0.30319' -Name 'SchUseStrongCrypto' -Value '1' -Type DWord
Now RESTART POWERSHELL IN ADMINISTRATOR MODE and now if you type:
[Net.ServicePointManager]::SecurityProtocol
You get tls, tsl1, tls12 - You'll be happy now. Go back and try your module update, import module, etc. and NuGet will load. 

Wednesday, November 27, 2019

Failure to Mount ISO on Windows Server 2016 and 2019

Problem

You have an ISO on a share in your network. You have mapped a drive to the share because, well, that's the right way to do it. And the users are happy about it, the service operations people can get to their stuff easily and the Admins have a share with all of the daily use tools.
Now, that library just happens to have a bunch of ISO files. You want to use one of them to install software, modify boot/install disks, etc. The easy button since Win 8 is the right click and Mount command. East peasy lemon squeezy. You get what looks like a CD Drive and you can browse the files.

Replication

Now, try that on a server with at least minimal security. Not happening.
  1. The right click Mount option is there. so the default application is Windows Explorer or File Explorer depending on your version.
  2. If you directly address the file as in \\file-01\share\mygreat.iso it will work
  3. If you map a drive "net use z: \\file-01\share" and try z:\mygreat.iso it will NOT work. It will tell you there is a problem.
  4. Yes, if you move it to a C Drive folder, or some other direct location it will work, but when you have a LIBRARY of iso files, that's not an option.

Supposition

This has to do with Administrative rights and UAC. Somehow the mapped drives (EVEN THOUGH THEY ARE MAPPED IN GROUP POLICY FOR ALL USERS) do not get mapped when you go to mount the ISO.
Before you suggest it. I'm already logged in as a domain admin.
This is a large issue. Many people are having this problem. And for those of you that are NOT having the problem. Good for you. Now lock your computers down so you don't get hacked, OK?


Monday, October 7, 2019

NetApp OnCommand Performance Manager

Installing

Installing OCPM is an easy OFV File install, but sometimes, you get a MonitorLoop error. What I found was that the OVF file had reservations for CPU and memory. Reduce those to Zero (0) and you should startup fine.
The next problem will be installing the VMWare tools. On my instance of 6.5U3, the OVF file came in with an OS Type of Other/Other and the VMware tools install can't find a disk for Other. Shut it down, go into Edit Settings and the VP Options tab. Epand General and you'll find the OS Choices. I was able to successfully install using "Centos 4/5 or higher x64". Set the VM Options to that, save, and power it back up.
You should now beable to open the console, select VMRC, Manage, Install VMWare tools. You will see the console update automatically that it is installing the tools. Eventually, it will bring you to the start of the setup questions. Location.
It's Whack-A-Mole from here.

Monday, August 12, 2019

CDBurnerXP command line problems ERROR 800402A0

An error (800402A0) occurred while executing the command

This is generally caused by an error in one of your paths. Try different options and see what the results are.

Simplify the folder option from this:
"C:\Program Files\CDBurnerXP\cdbxpcmd.exe" --burn-data -folder[\backup]:"D:\DiskBackup" -iso:"d:\datadisk.iso"

To this.
"C:\Program Files\CDBurnerXP\cdbxpcmd.exe" --burn-data -folder:"D:\DiskBackup\" -iso:"d:\datadisk.iso"

Use quotes around your paths.

Wednesday, April 24, 2019

vCenter VCSA Certificate Locations via SSH

HTTPS Strict Transport Security error

If you get the dreaded HTTPS Strict Transport Security error when going to vCenter and you CAN NOT get the certificate in order to install it. Because if you get the error, you don't get the screen that let's you download it. Catch-22.

Where it lives

Here is where it lives:
/etc/vmware/vmware-vmafd

Just putty or Secure CRT (MY ABSOLUTE FAVORITE) into the vCenter appliance, cd to the directory and cat the files. Then copy them, paste them to a notepad++file and save them with a .crt extension.

Import into Certificate Manager

Click start, and type certificate manager, run it.
The ca.crt file you should import and store in local computer in the trusted root certification authorities folder. The Machine-ssl.crt file just use local machine and let it figure it out.

DONE! 

No more red banner, no more HSTS error.

Now I'm leaving that took about 3 hours to figure out.

Thursday, March 7, 2019

Dell R640 Servers

Using these as ESXi Hosts

There are a number of things that you want to do if this is a true enterprise environment. You want to manage them as a group. that can be difficult especially in an offline environment.

Dell has lots of services for internet connected servers, but who really wants their credit card processing server touching the internet.

iDrac 9 info

https://www.dell.com/support/manuals/lt/en/ltbsdt1/poweredge-r940/idrac_3.00.00.00_ug/configuring-services-using-web-interface?guid=guid-7bb3e8b1-89f2-4ef5-94ab-146958142354&lang=en-us


VMware Enhanced Authentication not working

If you have accepted the certificates already, you next need to go to:
https://vmware-plugin:8094
and accept the certificate and all should be well. You may have to reload Firefox, but I didn't have to.

Also, if you are using Enterprise signed certificates, You will want to make sure that Firefox will recognize the Enterprise Certificate chain. If you push out your certs via Group Policy, look at the link below to get it working.


I’ve copied Tom’s Article in below to make sure that post doesn’t go away.

Configuring Firefox to use the Windows Certificate Store

·         2 months ago
·         Updated


VMware Horizon ADAM Database edits

Making changes to the ADAM Database

There are many reasons why you want to make changes to the ADAM Databse. It is the underlying database that holds the info on Pools, VDI Machines, etc. And this Database FREQUENTLY gets corrupted. I'm not sure why, I'm a big VMware Horizon fan, but man does it get messed up easily.

So to get into it there is a standard procedure that I grabbed from VMware's KB2012377 https://kb.vmware.com/s/article/2012377

Windows Server 2008 / 2012

To connect to the View ADAM database:
  1. Log in to one of the View Connection Servers as Domain Administrator.
  2. Click Start > Administrative Tools > ADSI Edit.
  3. In the console window, right-click ADSI Edit and click Connect to.
  4. In the Name field type:

    View ADAM Database
     
  5. Select Select or type a Distinguished Name or Naming Context.
  6. In the field below Select or type a Distinguished Name or Naming Context, type:

    dc=vdi,dc=vmware,dc=int
     
  7. Select Select or type a domain or server.
  8. In the field below Select or type a domain or server, type:

    localhost:389
     
  9. Click OK.
  10. Click View ADAM Database [localhost:389] to expand.
  11. Click DC=vdi,dc=vmware,dc=int to expand.
Note: If you are unable to connect using dc=vdi,dc=vmware,dc=int, try using dc=vdi;dc=vmware;dc=int.
Once in there, you have a number of common tasks that you can do.

Wednesday, February 13, 2019

Server 2019 - .Net 3.5 install failure

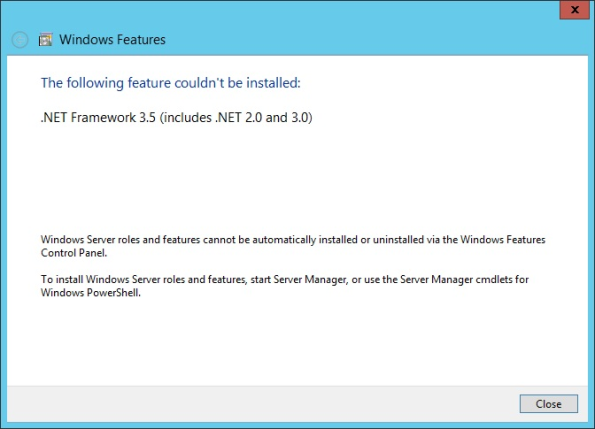
When spinning up a 2019 Server you may get a .Net 3.5 Error.

The following feature couldn't be installed:
.NET Framework 3.5 (includes .NET 2.0 and 3.0)


For .NET Framework 3.5, sometimes it will not install with the GUI and a message will be displayed.
Image result for install .net 3.5 on 2019 from powershell or Image result for install .net 3.5 on 2019 from powershell
To install it via PowerShell:

DISM /Online /NoRestart /Enable-Feature /FeatureName:NetFx3ServerFeatures /Source:D:\sources\sxs
DISM /Online /NoRestart /Enable-Feature /FeatureName:NetFx3 /Source:D:\sources\sxs

You may get an error after the first command, but the second command will fix that. D: is your DVD Drive, change that if it’s mounted elsewhere.

Monday, November 12, 2018

vCenter Appliance Emergency Mode

So the server is in Emergency mode, Now what.

The easiest is to run the journalctl command and look for an obvious /dev/sda<number> failure in the log. If you find that, skip to the fix.


The Fix

just use
e2fsck -y /dev/sda<number>

And you should be fine.

Notes on cleaning up images before a template or VDI Master Image

Clean up, because your Mom really IS watching

As always, I put these notes out here for myself because I keep forgetting them and it's the easiest place to get to when I'm working on a task that isn't near my list of notes.

This is almost exclusively powershell. Easiest for most applications, the data is pieline driven so you can just keep feeding data from one command to the next. And they keep coming up with new stuff like the new network command in PS3.

NOTE: If these commands Don't work, then upgrade your machine, I mean really, let's at least TRY to keep our infrastructure current, OK.

Cleaning up the Trash can

Clear-RecycleBin

That's it. Could be simpler but you need an alias for it which takes 10 more lines.

Steps to Clear All Event Logs in Event Viewer in Windows 10


  1. Open Cortana, type Powershell and select Windows Powershell.
  2. Type the following command and press Enter.
  3. wevtutil el | Foreach-Object {wevtutil cl “$_”}
  4. The event logs will be cleared.
I run this as admin and I still get a few that don't clean out, but it gets the bulk of them.

Tuesday, July 31, 2018

Foray into Arduino

OK, so I'm taking a brief foray into the arduino world.
My son and I are working on a Halloween costume using arduino, specifically the Adafruit Playground Classic. So below are some notes on the project.

The processor:

Since the playground is not specifically called out in all command references, it is important to note:
  • ATmega32u4 Processor, running at 3.3V and 8MHz
  • MicroUSB port for programming and debugging with Arduino IDE
  • USB port can act like serial port, keyboard, mouse, joystick or MIDI

Sensors and Pins

  • 10 x mini NeoPixels, each one can display any rainbow color
  • 1 x Motion sensor (LIS3DH triple-axis accelerometer with tap detection, free-fall detection) SPI Pins, CS Pin on PIN 8 and Interrupt on PIN 7
  • 1 x Temperature sensor (thermistor) PIN A0
  • 1 x Light sensor (phototransistor) PIN A5
  • 1 x Sound sensor (MEMS microphone) PIN A4
  • 1 x Mini speaker (magnetic buzzer) PIN 5
  • 2 x Push buttons, left and right PIN 19 Left, PIN 5 Right (Read HIGH)
  • 1 x Slide switch PIN 21 LOW Left, HIGH right
  • 8 x alligator-clip friendly input/output pins GPIO PINS 0, 1, 2, 3, 6, 9, 10, 12
    Includes I2C, UART, and 4 pins that can do analog inputs/PWM output
  • All 8 pads can act as capacitive touch inputs
  • Green "ON" LED so you know its powered
  • Red "#13" LED for basic blinking  PIN 13
  • Reset button

  • D10 / A10 - This pin can be digital I/O, or Analog Input. This pin has PWM output
  • D9 / A9 - This pin can be digital I/O, or Analog Input. This pin has PWM output.
  • D6 / A7 - This pin can be digital I/O, or Analog Input. This pin has PWM output.
  • D12 / A11 - This pin can be digital I/O, or Analog Input.
  • D1 - This pin can be digital I/O, it is also used for Hardware Serial Transmit, and can be an interrupt input.
  • D0 - This pin can be digital I/O, it is also used for Hardware Serial Receive, and can be an interrupt input.
  • D2 - This pin can be digital I/O, it is also the I2C SDA pin, and can be an interrupt input
  • D3 - This pin can be digital I/O or PWM output, it is also the I2C SCL pin, and can be an interrupt input
  • D4 - Left Button A
  • D5 - Speaker PWM output
  • D7 - Accelerometer interrupt
  • D13 - Red LED
  • D17 - Built-in 10 NeoPixels
  • D19 - Right Button B
  • D21 - Slide Switch
  • A0 - Temperature Sensor
  • A4 - Microphone sound sensor
  • A5 - Light Sensor


Friday, July 20, 2018

Remove VMware Horizon View VMs and Desktop Pools stuck in Deleting stage.

I have had several times where the Horizon Pool will not delete all the way, the VMs are stuck in a deleting phase (note: the VMs are gone from vCenter, just not from the inventory). That makes the Desktop Pool get stuck and Chaos ensues.

Most Recently I got stuck for several days before I found this article. I have made some additions, changes and comments to the process, but credit to Jacob Gardiner for the screen shots and SQL deep dive.

From Jacob's Blog - My Comments and suggestions below are in BLUE and RED

I have recently experienced an issue with VMware View Desktop Pools, I tried to remove a Desktop Pool but it did not successfully complete and it had been stuck in the ‘Deleting’ stage. You will need to complete the following steps to successfully remove these Desktop Pools. (You may not need to do all of this, if your VMs are gone and it's just the inventory in the admin tool, the ADSI will suffice)
Firstly you will need to remove the machines from the ADAM Database on the Horizon View Connection Server. We will need to use ADSI Edit to complete the removal of these objects.

NOTE: This assumes that you are RDPed into the Connection Manager Server. I am a BIG proponent of Admin VMs with all of your remote tools on them and NEVER RDPing int a server unless it is necessary. I HIGHLY Recommend running ADSI Edit from your Admin VM and using the following:
Select or Type a Distinguished Name or Naming Context – dc=vdi,dc=vmware,dc=int
Select or Type a Domain or Server 
  Actual Server – NET-00-HCM-01:389
You will need to navigate to ADSI Edit, You can complete this by typing adsiedit.msc in to a Run box. You will now need to select Action, then Connect To. You will need to put in the following information in the connection settings.
Select or Type a Distinguished Name or Naming Context – dc=vdi,dc=vmware,dc=int
Select or Type a Domain or Server – localhost:389
VMware View ADAM Connection Settings - Removing VMware Horizon View Desktop Pools Stuck In 'Deleting' stage
Once connected you will see the following in the left hand column.
ADSI Edit Default Naming Context - Removing VMware Horizon View Desktop Pools Stuck In 'Deleting' stage
We now need to create a query to search for the machines that we are trying to remove from the database. We will now need to create a query to find the machines that are in the ADAM Database. You can complete this by right clicking ‘Default Naming Context’ and selecting New –> Query. You need to fill in the New Query box with the following information –
Name – This can be a name of your choice.
Root of Search – This needs to be the ‘Servers’ folder.
Query String – (&(objectClass=pae-VM)(pae-displayname=VirtualMachineName))
The VirtualMachineName above should ACTUALLY BE your VM Name, or a wild card like NET-VMX-1* that gets just the VMs you need to delete. Most people don't need to delete all of them.
ADAM VM Query - Removing VMware Horizon View Desktop Pools Stuck In 'Deleting' stage
I would advise using the * Icon as a Wildcard for the VirtualMachineName if you are trying to remove multiple entries at once as this will show them all.
ADAM VM Query Wildcard - Removing VMware Horizon View Desktop Pools Stuck In 'Deleting' stage
You will now be presented with the following results in the VM Query section.
ADAM VM Query Results - Removing VMware Horizon View Desktop Pools Stuck In 'Deleting' stage
You will now need to locate the relevant VM’s that you want to remove. The specific fields you should be looking for is the Description and the ipHostNumber field. These fields are the most useful for identifying the virtual machines required. Scroll down in the list and actually find the PAE-DisplayName field. That is the actual name of the VM and is MUCH better for finding your errant VM.
Identify VM - Removing VMware Horizon View Desktop Pools Stuck In 'Deleting' stage
You can now right click the entry and select ‘Delete’ as required.

Normally, I can stop here. Go back and look at the admin console and refresh. The Pool should be gone. If not, then proceed from here.
You will now need to login to the SQL Management Studio to the View Composer Database. In my deployment the View Composer is on the VMware vCenter Server. Login with the relevant credentials you used when you installed VMware View.
Login to Database - Removing VMware Horizon View Desktop Pools Stuck In 'Deleting' stage
You will now need to navigate to the VMware View Composer Database –> Tables –> dbo.SVI_VM_NAME
You will need to right click this and select ‘Edit Top 200 Rows’
SQL dbo.SVI VM NAME - Removing VMware Horizon View Desktop Pools Stuck In 'Deleting' stage
Right click and select ‘Delete’ to the selected VM’s that you want to remove from the database. After this the Desktop Pool was removed in Horizon View.
You should now remove the Computer Account from AD.
You can then remove the VM/VM’s from vCenter by right clicking the VM and selecting Delete from Disk.
To find more information on this process you can follow these KB’s.

Thursday, May 24, 2018

Removing Modern Apps from Win10 Gold Image

You are creating a gold image. You are disconnected from the internet. You want to get rid of all the non-corporatte, interent grabbing apps on there.

I looked at this post https://gal.vin/2017/04/06/removing-uwp-apps-mdt/

And found some great tips. Look at the list of apps that can not be removed. You desperately want to, but don't be fooled.

I added an out-gridview command to mine.

Get-AppxPackage -allusers | out-gridView -Mode Multiple | remove-AppxPackage
It simplifies the whole script. Since you know the App name is valid, no error checking is needed.

Get-AppxProvisionedPackage -Online | Out-GridView -Mode Multiple | Remove-AppxProvisionedPackage -Online

And the same for the Provisioned Packages.

Remove snapshots on vCenter easily

If you have a bunch of snapshots all over your environment and you need to pick only a few to remove, here's an easy way.

I was looking through some posts and found this to get started. http://pipe2text.com/?page_id=251

I modified it a bit to get the items I needed.

We had an issue where the NetApp snap manager process failed and stayed in the event log at 44% or 59%. Rebooting the vCenter server worked, but we were left with smvi_ snapshots all over the place.

$snaps = get-vm svr-00* | get-snapshot | where {$_.descrption -like "*201804*" | select-object vm,name,description | out-gridview -mode multiple
foreach ($snap in $snaps) {
get-vm $snap.vm | get-snapshot $snap.name -RunAsync -verbose -confirm:$false
}

You can change the svr-00* to be a subset of your VMs or remove it to get all of them.
You can modify "*201804*" to filter for a particular description.

Gives you a nice list, you can sort by column, pick the ones you want and clean it up.

If you want to get fancy, you can change the items to variable,s get some input from the user and plop it into the code. But I'll let you get fancy, here is the quick and dirty to get you started.

installing ESX 5.5 on HP Gen9 with internal SD Card

So for those of you still on 5.5 and not taking the leap to 6.5 (which is great since you can simply upgrade your whole Windows vCenter server to the vCenter appliance in one swift motion), we are going to look at the issues of Gen9 servers with ESX 5.5

First of all the SD Card, the smallest you can get from HP right now is 8GB, that I'm sure will increase again in a week or two. But it's more than enough for ESX.

So when the installed finds your storage, you'll see HP ILO SD Card, that is it. It bothered me because it said ILO and the ILO itself has an embedded installer folder and a user data folder that can be enabled, but that is the one to pick.

UPDATE: for the Gen10 servers it is USB 3.0 CDW weird names it finds, but knowing is half the battle.

Saturday, July 25, 2015

HP BL460 Blade Servers G7 vs G8 vs G9 Evaluation

HP has a solid chassis lineup for their blade servers, but if you don't purchase 100 blades all at once, you may be stuck with various Generations "G"s of their blades.

G7 - the LOM was fixed based on the base part number you started with. Then you add mezzanine cards of various models. The SD Chip to boot, is right on the side of the blade.

G8 - So, now you can CHOOSe the LOM module you want and swap it out if you want. You can add mezzanine cards, but WOW, the G7s don't fit in the G8s. A big disappointment to me when I had 8 extra 10GbE FlexFabric adapters from the G7s at 3K each and couldn't put them in the new G8s.

More coming

Friday, July 24, 2015

NetApp E-Series

I'm going to get an E5660 to play with soon. I want to see what it will be like as a target for backup. Looks like a pretty good bulk storage unit, 10GbE interface with iSCSI, or if you want, you can do 16Gbit FC. I'm going to stick with the 10GbE, because I have a lot of ports on the Cisco Nexus 5596s and the HP Blade chassis is connected to that as well.

HP has their 3Par 4200 series, but it was a lot more expensive than the E-Series.

Waiting on the stuff to come in, then I'll post more.